Enter Your Address.
See How We'd Build It.
Not ready?
Every phase documented.
Nothing skipped.
Hover or tap any card to see the materials, cross-section, and exactly why each step prevents a callback. This is how we work — transparent by design.
Substrate Inspection
Before a single tile is touched
We probe deflection, check for moisture, and map every high/low point before quoting.
- Moisture meter
- Deflection gauge (L/360 standard)
- Feeler gauge
- Straight-edge 10ft
Subfloor → Existing surface → Inspection report with annotated plan
Identifies hollow spots, soft joists, and moisture intrusion before any material is ordered.
Waterproof Membrane
Schluter DITRA & Mapei system
Full surface waterproofing — not just seams. Every wet room gets a bonded membrane to the substrate.
- Schluter DITRA-HEAT
- Mapei Aquadefense
- Schluter Kerdi-Band (corners)
- Mapei Ultralite S2
Concrete/CBU → Aquadefense flood coat → Kerdi-Band at transitions → DITRA uncoupling mat
Prevents water intrusion at substrate level, eliminating mold and tile pop from freeze-thaw.
Layout Dry-Fit
Every cut planned before mixing thinset
Full field dry-laid before any adhesive. Pattern alignment, cut placement, and grout joint width confirmed.
- Laser level
- Chalk line
- Spacers (1/16″–3/8″)
- Story pole
Reference lines snapped from center → Dry tile field → Cut pieces confirmed → Photo documentation
Catches pattern misalignment and awkward cuts before thinset commits them.
Thinset Spread
Back-butter on every large format
95%+ mortar coverage on every tile — back-buttered on anything over 15". No voids, no hollow spots.
- Mapei Kerabond T
- Mapei Granirapid (large format)
- Notched trowel (3/8″ × 3/8″ square)
- Back-butter trowel
Substrate → Thinset bed (combed) → Back-buttered tile back → Set with slight twist → 95% coverage verified
Eliminates hollow tile, cracking under point load, and grout joint failure from flex.
Tile Setting
Lippage controlled to 1/32″
Leveling clips on every joint. Lippage held to 1/32″ max — the industry standard most installers ignore.
- Raimondi leveling system (1.5mm clips)
- Rubber mallet
- Digital level (0.1° precision)
- Tile spacers
Set tile → Insert leveling clip → Tighten cap → Check with digital level → Repeat per manufacturer spec
Prevents lippage complaints, tripping hazards, and grout joint cracking from uneven stress.
Grouting
Sanded, unsanded, or epoxy — matched to joint
Joint width, tile type, and wet/dry exposure determine grout selection. Epoxy in showers, urethane on floors.
- Mapei Ultracolor Plus FA
- Laticrete Spectralock Epoxy (wet rooms)
- Mapei Kerapoxy CQ
- Grout float, rubber squeegee
Cured tile field → Joints cleaned of haze → Grout mixed per spec → Float diagonally → Haze removed in stages
Correct product selection prevents grout cracking, staining, and mold in wet environments.
Final Seal & Punch
Caulk, seal, and walk the floor
Expansion joints caulked (never grouted). Stone sealed. Floor walked with a straight-edge. Photos delivered.
- Mapei 100% Silicone (movement joints)
- Miracle Sealants 511 Impregnator
- Straight-edge 6ft
- Punch list checklist
Cured grout → Stone sealer applied (2 coats) → Movement joints caulked at all plane changes → Punch walk
Movement joints prevent cracked grout at transitions. Sealant protects porous stone from staining.
Ready to plan your installation?
We'll scope your substrate and send a phase-by-phase plan within 48 hours.
The process,
collapsed into proof.
Every project here started with a substrate inspection and ended with a signed punch list. Hover to see the material specification and location.
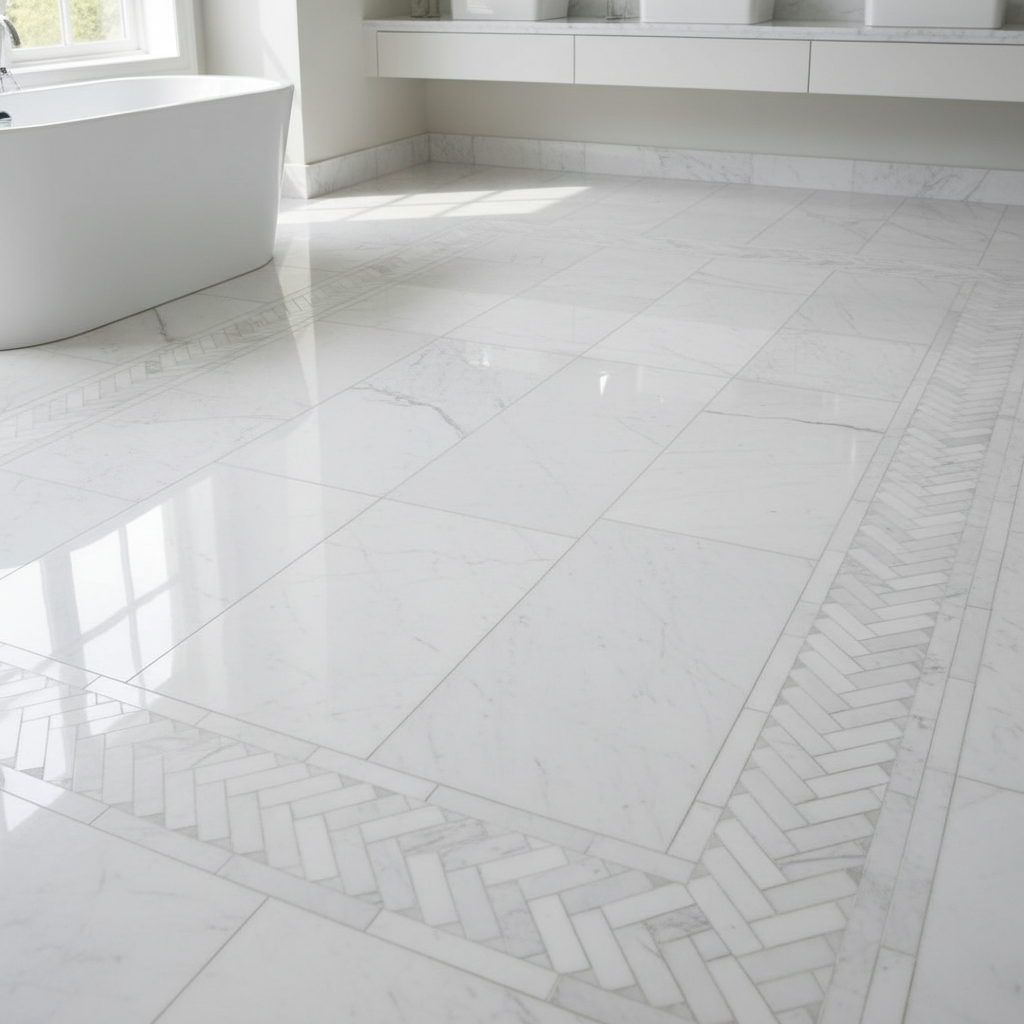
Calacatta Marble · 24×48
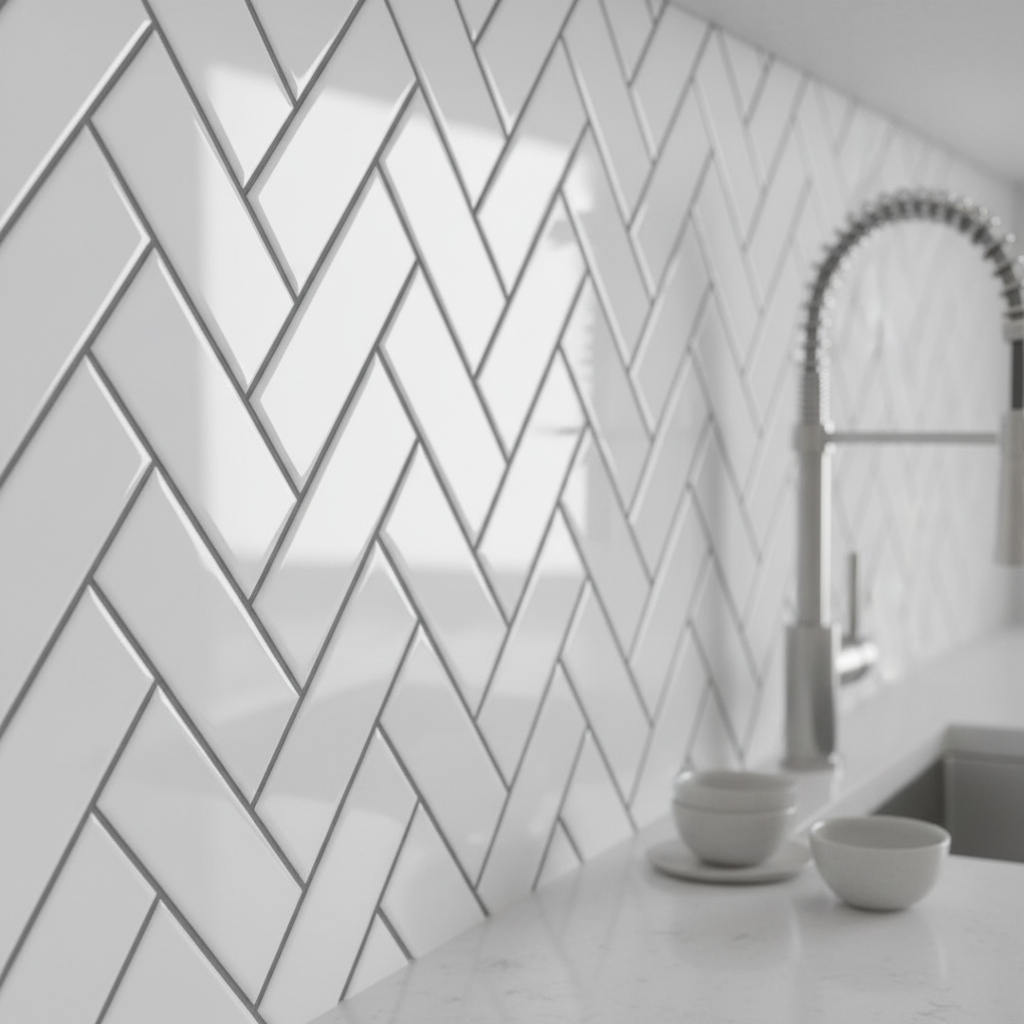
Glazed Ceramic · Herringbone
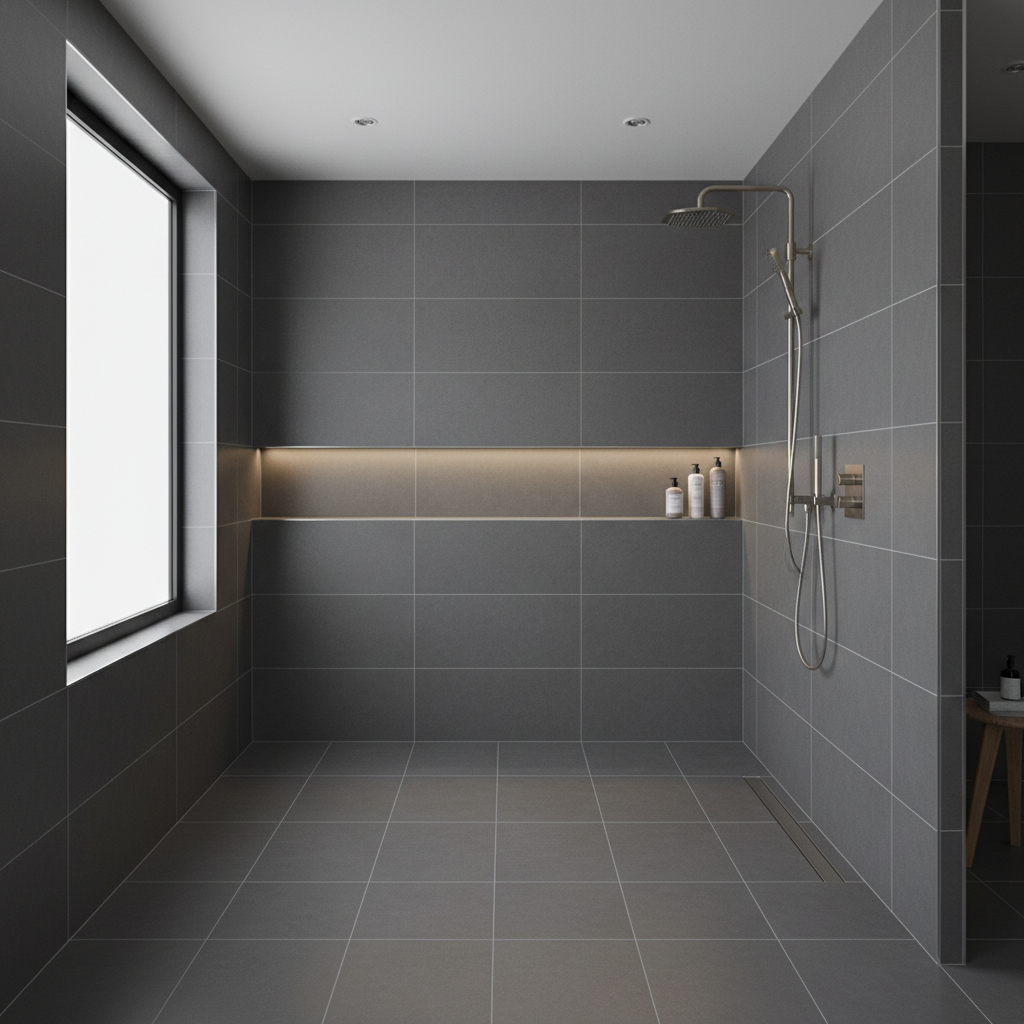
Porcelain · 12×24 · DITRA waterproof
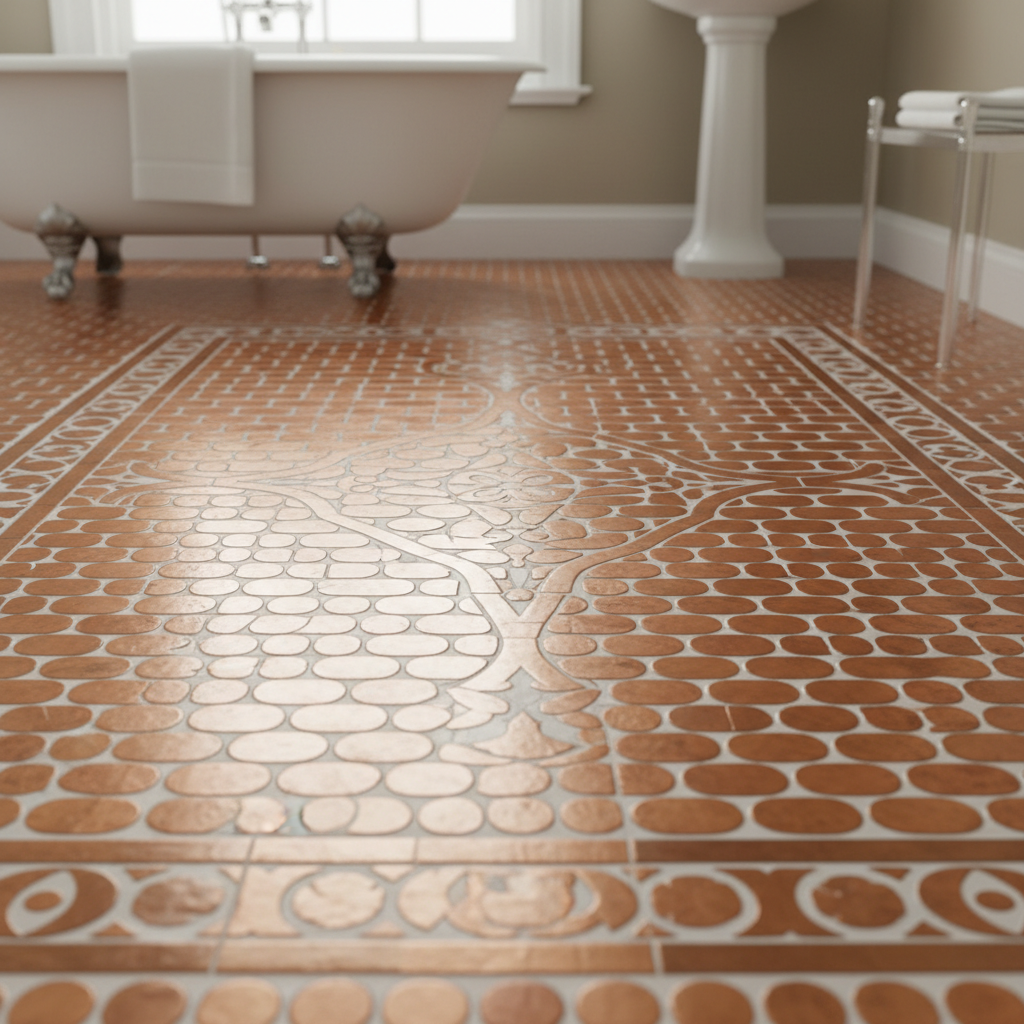
Penny Round Porcelain · Designer Spec
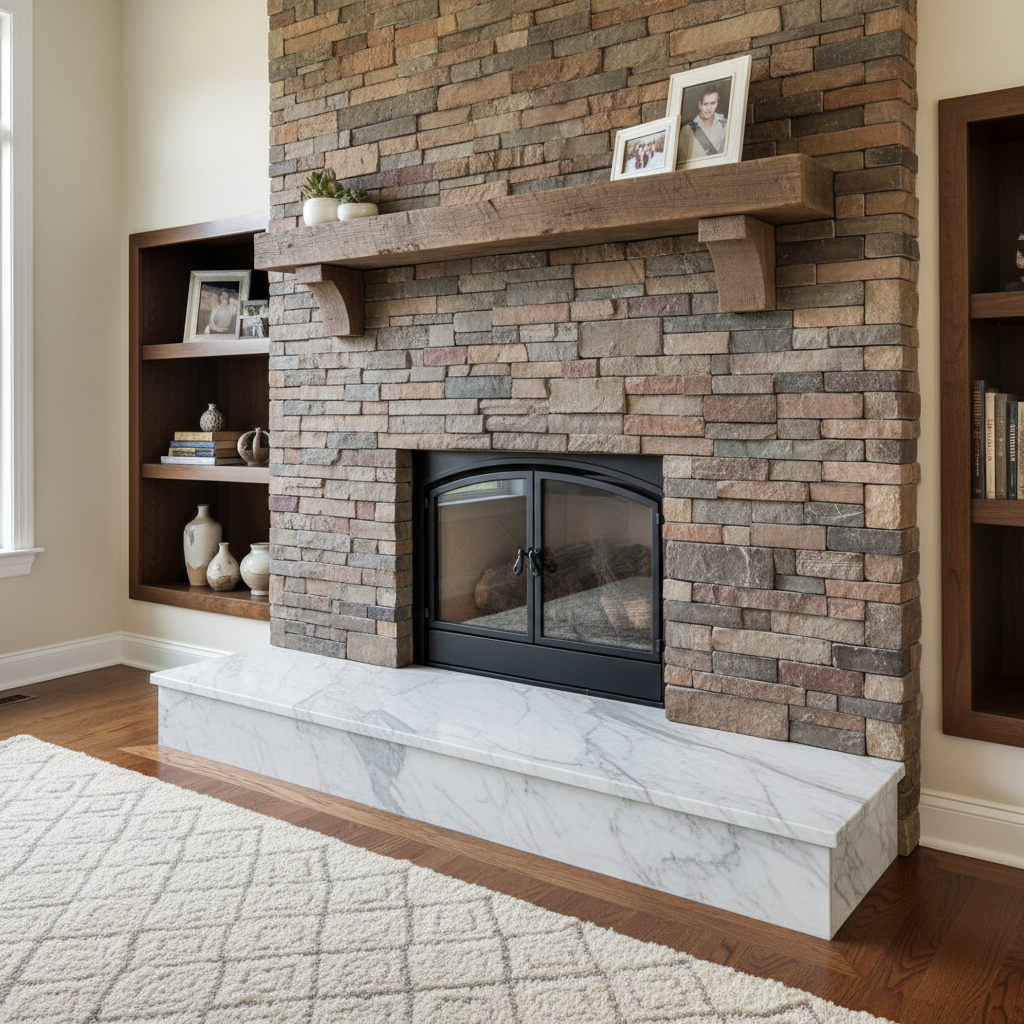
Ledger Stone · Marble Threshold

Porcelain Pavers · Frost-rated mortar
The same standard,
whoever's asking.
“I had $4,200 in Calacatta marble and I was not going to hand it to someone who couldn't tell me what was under my subfloor. Grout sent a substrate report before we even signed. The installation was flawless — not a single hollow tile.”
Rebecca Hartmann
Homeowner
Lincoln Park Renovation
“On gut renovations I need subs who show up on day 14, not day 22. Grout has hit schedule on six consecutive projects. Their punch lists are cleaner than most GCs I've worked with. I stop looking for tile subs when I found them.”
Marcus Delgado
Project Manager
Ironclad Build Group, Chicago
“I specced a 3/8″ offset herringbone in Zellige clay tile for a kitchen. Most installers would have talked me out of it. Grout dry-fit the entire field, photographed the layout for my approval, and executed it without a single chipped tile.”
Priya Nair
Principal Designer
Studio Nair Interiors, Chicago
Tell us the site.
We'll scope the work.
We respond within 48 hours with a phase-by-phase install plan, substrate assessment, and a material spec tailored to your project.
Substrate Prep Checklist
The 14-point inspection we run before pressing a single tile. Free download.
Schedule Reliability
Show-up rate on committed dates: 97% across 6 years
Documented Process
Photo documentation at every phase — substrate through final seal
5-Year Labor Warranty
On all waterproofed installations with Schluter or Mapei systems
Licensed in Illinois
Fully licensed, bonded, and insured · IL Lic #1234567